Travis CI and Azure Web Apps
Travis CI and Azure Web Apps
Azure Web Apps allows developers to have different environments or slots for the same website (learn more here). Slots are useful if you want to test things right before going into production in an environment similar to it (they could be virtually identical).
In the case of webhint.io we have 2 slots or environments and the process of changing the code from one place to another is done via a custom Travis CI script.
The TL;DR; version is:
- Staging: Every time there is a change into the documentation of the CLI’s repo, or the site’s one, the code is downloaded, built and deployed into staging automatically.
- Production: Once staging is updated, it gets tested and if no problems are found, the code gets promoted to production. Same as before, this is done automatically.
This guide documents how to deploy your website into an Azure Web App
slot, test it using webhint, and put it into production. All of this
using Travis CI.
It assumes the user has a Travis CI and an Azure account, this last one
with an Azure Web App already created.
Create and configure a staging slot in your Azure Web App
To create a slot in your website you have to:
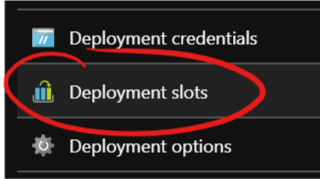
Select “Deployment slots” in the blade of your Azure Web App:
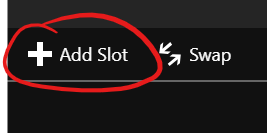
Select “Add Slot” in the blade that appears:
Choose a name (e.g.: “staging”) and select a source to clone if applicable (e.g.: “production”). This will copy all the environment variables in the source such as
NODE_ENV=production: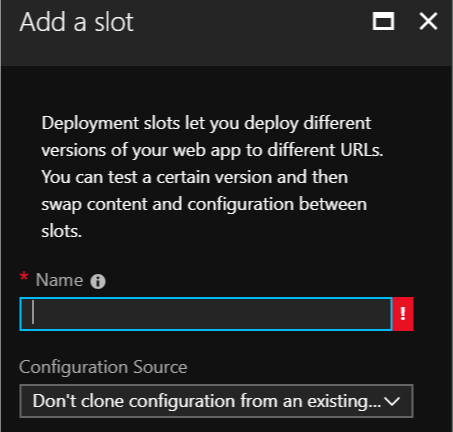
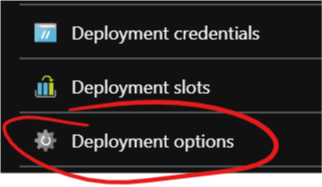
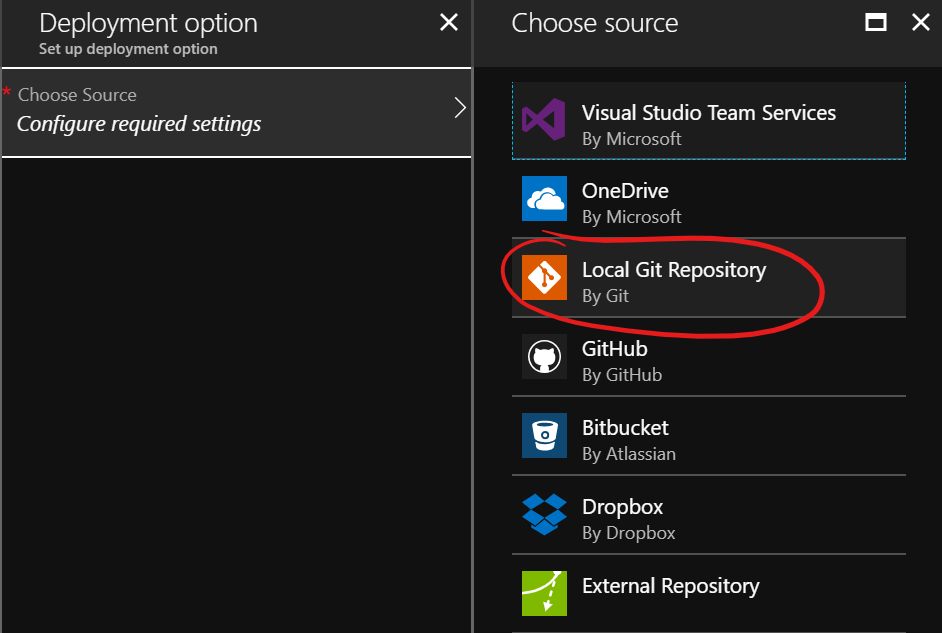
Select the new slot in the menu and then “Deployment options”
In the new menu, select “Local Git Repository”
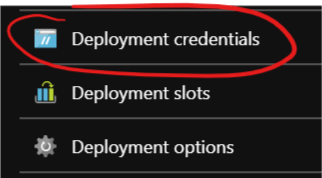
At this moment you might have to create some “deployment credentials”. You can do so via the “Deployment credentials” option:
Create and configure a service principal
This is an optional step, but recommended. You should create a service principal with only access to the bare minimum. That way you do not have to put your credentials anywhere (even if they are encrypted), and if something happens you can easily revoke access to it.
To achieve this, you first need to install the Azure CLI. Then log in into your account using:
az login
A browser should open and give you access in the command line.
Note: If your account has access to multiple Azure subscriptions, make sure to choose the right one via
az account set --subscription "My Subscription".Then create a service principal:
az ad sp create-for-rbac --name NAME --password PASSWORD --subscription "My Subscription"You should get an output like:
{
   "appId": "b583eadf-7643-4b67-91a1-eb057d9fe24f",
   "displayName": "NAME",
   "name": "http://NAME",
   "password": "PASSWORD",
   "tenant": "22cfb846-dedd-4bc1-b664-83c738e456e0"
}
You should write down this information, but the fields we will use later are:
namepasswordtenant
By default, service principals are created with the
Contributorrole. Unless you want this account to have access to anything, you should remove it and scope it down. For this case, theWebsite Contributorshould be enough and you should give this role only for the Azure WebApp you are using.- Go to the Azure Portal, select your Azure WebApp and click on “Access control (IAM)”.
- Click on “+ Add”.
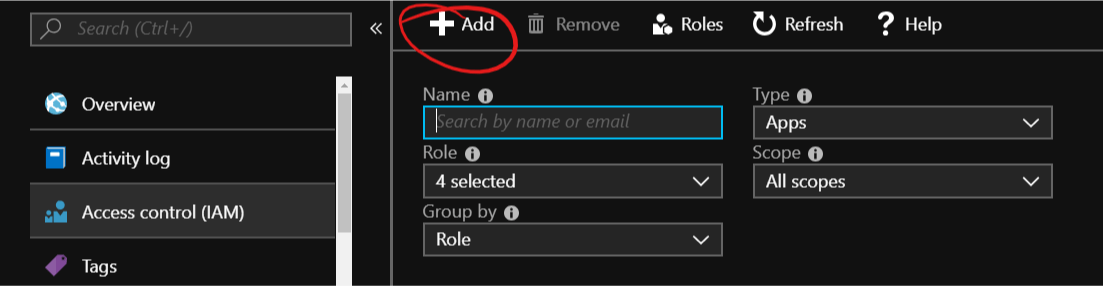
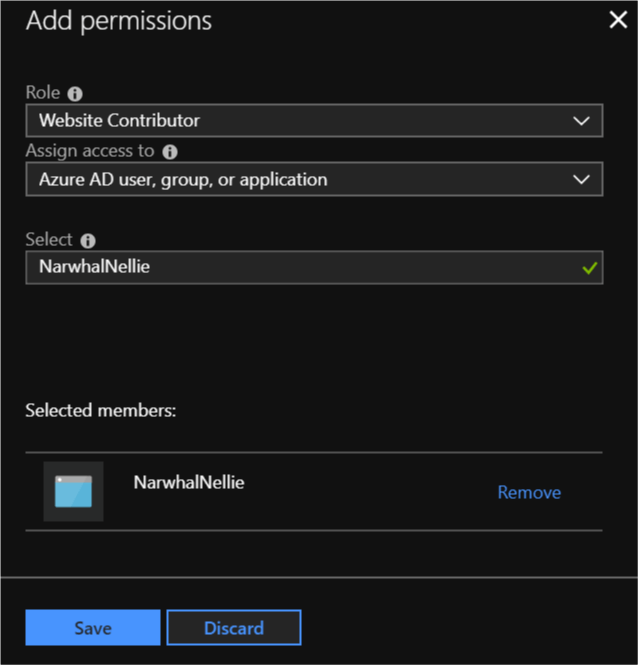
- Search and select the service principal you created before.
- Add the “Website Contributor” role and click Save.
Add and configure webhint in your project
First thing you have to do is add webhint to your project:
npm install hint --save-dev |
Then you need a valid .hintrc file. For a starter file, use the
following command and answer the questions:
npm create hintrc |
You can use the generated file as a starter point for your needs, ignoring URLs you do not have control over, tweaking the configuration of some of the hints, etc.
Finally, add a task to your package.json that will test the staging
environment:
{
    ...
    "scripts": {
        "test:staging": "hint https://example-staging.azurewebsites.net",
        ...
    }
} |
Configure Travis CI
The last remaining piece is Travis CI. As stated earlier, Travis CI is in
charge of deploying, running the tests, and changing the code from staging
to production. And all of this from the .travis.yml of your project!
Travis has several steps and you can configure what scripts or actions
execute in each one. E.g.: before_install, before_deploy, deploy,
etc. To know more about the different steps, visit
Travis CI’s Build Lifecycle.
One thing to consider is that not all the scripts can break the build on
Travis. If you want to stop the process if webhint fails, you will have
to combine a few steps into one. There are more details further on, but you
can learn more in Travis CI’s Breaking the Build.
Deploy the code into staging
The staging slot should have a local Git repository. Every time there is
push event in this repository, Azure will trigger the installation process
(basically download the code and then execute npm install).
There are 2 ways to get the code into staging in Travis CI:
Travis CI Azure deploy
Travis CI has built-in support to deploy to Azure. To enable it you have to configure the following environment variables:
AZURE_WA_USERNAME: User name to use for the deploymentAZURE_WA_PASSWORD: Password to use for the deploymentAZURE_WA_SITE: Site to deploy to. E.g.:mysiteAZURE_WA_SLOT: Slot to deploy to. E.g.:staging
With the values above, Travis CI will deploy the code to
https://mysite-staging.azurewebsites.net.
It is recommended to encrypt these environment variables for security reasons.
How to encrypt environment variables:
Install
apt-get ruby ruby-dev(Windows users can use WSL; macOS users do not need to do this).Install the Travis CI gem:
gem install travisLog into Travis CI:
travis loginEncrypt the variables:
travis encrypt -r "<username>/<repository>" \
  AZURE_WA_USERNAME="<username>" \
  AZURE_WA_PASSWORD="<password>" \
  AZURE_WA_SITE="<site>" \
  AZURE_WA_SLOT="<slot>"
This should output something in the form of:
secure: "Bx6tfqQJYjlSofs3wEr2iqWx75HuR+Qtybomc97ueGxlkHjCXKF2A7one9ykwm+EVdJGVPLKM4bvS2ebqeNSPFSNyZbajXLV24lXgXsA3UVsXI3kBDkKG/bouyuQWvCeYAKF1XSbQM3513XbYSDWCdO72IkB5E961nvKCkLcsvJ+WGeE+3YtigK8ThHlzcM9Twt22y7ZQa4Y429uR6I1tAYzYkp4XHG/SO0tb9SAdGDg"Add it to your
.travis.ymlnear the top under:env: global: - secure: "Bx6tfqQJYjlSofs3wEr2iqWx75HuR+Qtybomc97ueGxlkHjCXKF2A7one9ykwm+EVdJGVPLKM4bvS2ebqeNSPFSNyZbajXLV24lXgXsA3UVsXI3kBDkKG/bouyuQWvCeYAKF1XSbQM3513XbYSDWCdO72IkB5E961nvKCkLcsvJ+WGeE+3YtigK8ThHlzcM9Twt22y7ZQa4Y429uR6I1tAYzYkp4XHG/SO0tb9SAdGDg" ...
Now that you have added the credentials to deploy to Azure you can deploy to it:
...

deploy:
  - provider: azure_web_apps
... |
One thing to keep in mind, is that .gitignore will be respected at this
moment. If you have artifacts from a build step that need to be published
and your .gitignore ignores them, you will have to update it before this
stage.
An easy way to do this is to have a “production” .gitignore and replace
one with the other in the before_deploy:
...

before_deploy:
  - mv .gitignore.prod .gitignore

deploy:
  - provider: azure_web_apps
... |
Another thing to consider is that Travis CI resets the working directory before deploying. If your deployment relies on a build step, you probably want to change that:
...

before_deploy:
  - mv .gitignore.prod .gitignore

deploy:
  - provider: azure_web_apps
    skip_clean: true
... |
The next step is to test using webhint. You should have test:staging
in your package.json. Use it in the after_deploy stage:
...

before_deploy:
  - mv .gitignore.prod .gitignore

deploy:
  - provider: azure_web_apps
    skip_clean: true

after_deploy: npm run test:staging

... |
NOTE: As mentioned previously, non-zero exit codes for stages after
script do not change the status of the build.
Manually deploy to Azure from Travis
There are a few limitations when running the (before_|after_)deploy stages:
- The build will not fail even if they exit with a non-zero value.
- Modifying the
.gitignorefile during the build can be cumbersome and errors here can be difficult to catch.
To solve these issues, you should collapse the different stage scripts into the
script stage. In the case of webhint.io, it looks as follows:
...

script:
  - npm test
  - npm run travis-update
  - npm run test:staging
  - npm run swap

... |
The steps are:
npm test: Lint and build the site.npm run travis-update: Copy all the files we need for the deployment (minusnode_modules) into a temporary folder and push them into the Azure WebApp Git repository. Example.npm run test-staging: Test the staging environment withwebhint. This is the script created previously.npm run swap: Change the code instagingtoproductionafter installing the Azure CLI. Example.
You will still have to add some encrypted environment variables to make everything work.
Congratulations, you can now deploy to your Azure WebApp from Travis!
Test and swap into production
If you have followed the instructions, you should have a test:staging
task in your package.json. Now it is time to use it:
Update your .travis.yml to run it after the deploy:
after_deploy: npm run test:staging |
You also want to swap if everything goes right. To do this, the first
step is to install the Azure CLI in Travis CI. The
following snippet of .travis.yml assumes the machine runs Linux:
# Install Azure CLI
before_install:
  - AZ_REPO=$(lsb_release -cs) && echo "deb [arch=amd64] https://packages.microsoft.com/repos/azure-cli/ $AZ_REPO main" | sudo tee /etc/apt/sources.list.d/azure-cli.list
  - curl -L https://packages.microsoft.com/keys/microsoft.asc | sudo apt-key add -
  - sudo apt-get install apt-transport-https
- sudo apt-get update && sudo apt-get install azure-cli |
Then you need to log into Azure using the Service Principal credentials
from before and do the swap. It’s probably easier to have a script file
that does everything and call it from the after_script stage or any
other you might be using:
#!/bin/bash

az login --service-principal -u $AZURE_SERVICE_PRINCIPAL -p $AZURE_SERVICE_PRINCIPAL_PASSWORD --tenant $AZURE_TENANT

az webapp deployment slot swap -g RESOURCEGROUP -n SITE --slot SLOTNAME |
NOTE: You have to replace the values RESOURCEGROUP, SITE and
SLOTENAME with yours. Also, you will have to create the encrypted
environment variables for them similarly to what was described before:
travis encrypt -r "<username>/<repository>" \
    AZURE_SERVICE_PRINCIPAL="<service principal>" \
    AZURE_SERVICE_PRINCIPAL_PASSWORD="<service principal password>" \
AZURE_TENANT="<tenant>" |
Please refer to the Azure CLI documentation for other authentication methods.
If the above is under .travis/swap.sh, then your .travis.yml should
have something similar to:
...

after_script: .travis/swap.sh

... |
NOTE: Remember that all stages after script will not change the
build status, nor will they interrupt the execution, so you might want to
move the actions to another stage depending on your needs.
Full example
The following is a functional .travis.yml that does the following:
| Stage | Action |
|---|---|
before_install |
Install Azure CLI |
install |
Install (default) |
script |
Build and test |
before_deploy |
Prepare .gitignore |
deploy |
Deploy into Azure without cleaning the workspace |
after_deploy |
Test staging with webhint |
after_script |
Swap slots |
NOTE: This will not change the status of your build if webhint
fails in staging. To achieve that you will have to combine all the
stages after script into script
(webhint.io’s .travis.yml does that).
# For more information about the configurations used
# in this file, please see the Travis CI documentation.
#
# https://docs.travis-ci.com

sudo: required

env:
  global:

    # AZURE_WA_USERNAME, AZURE_WA_PASSWORD, AZURE_WA_SITE, AZURE_WA_SLOT
    - secure: "Bx6tfqQJYjlSofs3wEr2iqWx75HuR+Qtybomc97ueGxlkHjCXKF2A7one9ykwm+EVdJGVPLKM4bvS2ebqeNSPFSNyZbajXLV24lXgXsA3UVsXI3kBDkKG/bouyuQWvCeYAKF1XSbQM3513XbYSDWCdO72IkB5E961nvKCkLcsvJ+WGeE+3YtigK8ThHlzcM9Twt22y7ZQa4Y429uR6I1tAYzYkp4XHG/SO0tb9SAdGDg"

    # AZURE_SERVICE_PRINCIPAL, AZURE_SERVICE_PRINCIPAL_PASSWORD, AZURE_TENANT
    - secure: "AZZj6fRlKTVlgdmF7QeYCz/fZZ9Z8WIGrz0wRGX1vz6DB7EcvmyNbdH6RKQ4Wt2OIp+/R0u/opdQfRwyQvQuAVNK3PmGDXqiiXkKhYPHIMN35A4+iIRx+bg+gIYotEdAkux307/Qd5s7BlYDGGGRmClml74u7UHM6nCz9kql8lWrJ92yN5YaPXsKwvdnmCuRAIzVZ8kWCi24VW1"

# Install Azure CLI: https://docs.microsoft.com/en-us/cli/azure/install-azure-cli-apt?view=azure-cli-latest
before_install:
  - AZ_REPO=$(lsb_release -cs) && echo "deb [arch=amd64] https://packages.microsoft.com/repos/azure-cli/ $AZ_REPO main" | sudo tee /etc/apt/sources.list.d/azure-cli.list
  - curl -L https://packages.microsoft.com/keys/microsoft.asc | sudo apt-key add -
  - sudo apt-get install apt-transport-https
  - sudo apt-get update && sudo apt-get install azure-cli

# This runs linters and builds the website
script:
  - npm test

# The deploy requires the artifacts from the build, so we update the .gitignore to get the files we want: https://docs.travis-ci.com/user/deployment/azure-web-apps/#note-on-gitignore
before_deploy:
  - mv .gitignore.production .gitignore

deploy:
  - provider: azure_web_apps
    skip_cleanup: true

after_deploy:
  - npm run test-staging

after_script:
  - npm run swap

language: node_js

node_js: lts/*

notifications:
  email:
    on_failure: always
on_success: never |